Create MP3 (Part 5)
Once we have our exported WAV audio from Audacity, we need to create an MP3 file. This is because our WAV file is probably over 100 megabytes, whereas an MP3 file will weigh in closer to 6 Mb.
In a previous version of these instructions, I recommended using Auphonic. Auphonic is a great online tool which creates beautiful sounding MP3 files. Recently (early 2025), however, auphonic now inserts a poor (in my opinion) sounding ‘jingle’ at the start of processed recordings for free users. (Auphonic gives 2 hours of processing free each month. In the past I’ve paid for extra processing time, but whenever you’re using the free hours, the jingle is included.)
So, these instructions are for processing an audio file in Audacity to proceduce acceptable quality audio files. It won’t sound as good as Auphonic, but it’s free.
1. Edit recording
We begin by manually editing what’s been recorded.
The first step is to remove the extra audio from the start and end of the sermon. To do this,
- listen to your recording until you hear the place you want to start,
- click where you want to start. You can move this cursor using the arrow keys to make small adjustments to the cursor location. You can test whether you’ve got the right moment by using your spacebar to play and pause.
- Select from the start of the audio up until the cursor:
Edit->Select->Track Start to Cursor. - Press
delete.
The process is almost the same to remove the end of the recording, except you use the Edit->Select->Cursor to Track End menu item.
Next, I need to increase the volume of the recording. I don’t know why, but with our church setup, the recording volume is always quite low, but since there’s not too much ’noise,’ running the amplify effect means I can see (the waveform) and hear the recording clearly.
To increase the volume, select the whole recording (Edit->Select->All or press Ctrl-A) and then select Effect->Volume and Compression->Amplify). I use the default settings, ensuring that Allow clipping` is not selected.
!Amplify](/uploads/2025/04/amplify.png)
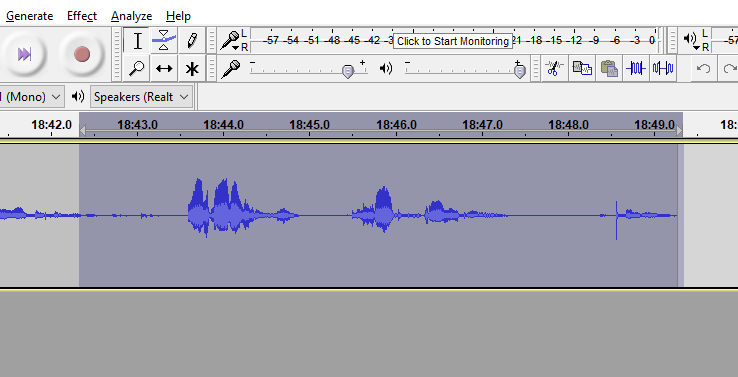
Now the audio is at an acceptable level, I scroll through the waveform looking for ‘mouth sounds’ (breaths, ticks, etc.). These often appear as small ‘waves’ or ‘blips’ in the audio. As with removing the start/end of the recording, in Audacity these are remove by ‘highlighting’ the section of audio and pressing delete.

You can also remove pauses and silences in your recording. Truncate Silences is an easy way to make the recording a bit shorter for listeners, and the file slightly smaller. To do this,
- Select your whole recording (
⌘-AorEdit->Select->All). - Open the Truncate Silence effect:
Effects->Special->Truncate Silence. - At first try these settings: Level -30db and Duration 1.5 seconds. (You may find others which work better for you.). (These days I’m trialling compressing to 75% of the original lenth.)
2. Improve Volume (Compression)
In normal speaking/preaching, there’ll be a fair variety in volume—from wispers to (almost) shouts. This is effective in the church/live setting, but can cause problems for podcast listeners who may be listening in noisy environments (car/gym/etc.). So we need to compress the audio. This is not the same as file compression (converting to an MP3) but is an audio technique to make the quiet parts louder and the loud parts quieter.
The compressor provided with Audacity works well, but I prefer Chris’ Dynamic Compressor plugin (instructions for downloading and installing the plugin are on the linked page).

Once installed, the plugin is available at Effects-Compress dynamics. Again, select all of your recording and open the plugin. I’m finding it’s helping to increase the Noise gate falloff, so that very quiet sounds (like breaths or ambient noises) aren’t increased too much.
After compressing, some extra noises may become apparent in the recording, so I do another quick run through removing them.
3. Improve Sound Quality (EQ)
Finally, there are some things you can do to quickly improve the sound of the recording.
Since we’re only recording spoken word (not music), we don’t need high frequencies. These can make the audio sound ’tinny’. So I run the Effects->EQ and Filters->High-Pass Filter to ‘roll off’ everything below 75 Hz. I probably should also use a more detailed EQ, but I haven’t yet discovered the right parameters.
4. Create MP3
Now you’re ready to create an MP3 file (yes, you could improve the sounds loads more—-but there are more significant things to do!).

- Click
File->Export Audio.... - Select Format as
MP3 Files - Select a
ConstantBit Rate Mode. - Then select a fairly low Quality (I think 32 kbps is sufficient for sermon podcasts with no music)
- You can
Edit Medtadataif you wish. - Then click
Export.
You can then download the processed MP3 and upload it to Backblaze B2 in preparation for posting to Wordpress.