Record Sermon (Part 4)
This tutorial is going to explain how to record using the free program, Audacity. There are other ways you could record a sermon, such using a dedicated recorder or even your phone. However, Audacity is a good option as it’s free and runs well even on older computers.
1. Plug things in
To get started, you’ll need to connect your computer to your church’s PA system. Most older PA systems will have an RCA line output, whereas newer ones may have a USB output.
If you are recording an analogue signal you’ll need a cable that has two RCA connectors at one end and a headphone (3.5mm) connector at the other.

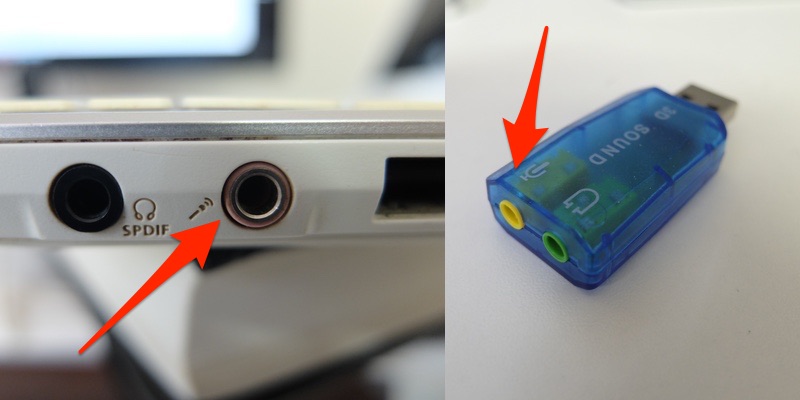
Plug the 3.5mm plug into the input of your computer. The input will usually have a picture of a microphone or an arrow going into a circle (or it’s not the one with the headphones picture). Not all newer computers have a microphone/line input. So you may need to purchase a USB sound card which has an audio input.
2. Set up Audacity for recording
There are a few settings you need to check in Audacity.
- Audio input selection. This is the drop-down list beside the microphone icon. You’ll need to set the input to something like line-in or microphone. If your computer has a built-in microphone or a webcam, there may be a few options in this list.
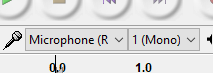

Recording settings. Since we’re only recording speech, you can save some disk space by lowering the quality of your recording. I record the sermon at 22050Hz in mono. The sample rate is set down the botom of the screen and the mono/stereo setting is changed by clicking the drop-down list right next to where the audio input is selected.
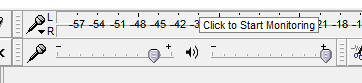
Audio input volume. For this, you need to balance the volume of the signal coming from the mixing desk and the volume of the computers’ audio input. The only way to get this right is to try a few options. You can change the input volume by moving the slider next to the microphone icon in Audacity. The aim is to have the blue waveform (it’s a visual representation of the audio) to not ever hit the 1.0 line, but to sit around 0.5.

Once you have a reasonable level, you’re all set to record. It’s simply a matter of pressing record sometime before the sermon starts and pressing stop when it finishes.
I like to do a quick test record before the service, and save it with the file name I want. Then I delete the test recording (just click the little x button for the track) then save again (yes, Audacity will warn you that you’re saving a blank project). The reason I do this is I can click ⌘-S or Ctrl-S when the recording finishes, and I know everything is saved correctly.
This is everything to do during the service. The next step is, back in your office, to edit the recording and create an MP3 file ready for the internet.